Avoid Light Immission – Targeted Lighting Design with DIALux evo 13.1
Light is more than just brightness. It affects your well-being, your sleep, and the ecological balance. When used correctly, light ensures safety and orientation. But misdirected or excessive light – known as stray light or light immission – can be disruptive and negatively impact people, animals, and nature.
At DIAL, we’ve worked closely with lighting designers from the DIALux Community and luminaire manufacturers to analyze concrete requirements for assessing light immission.
The result: DIALux evo 13.1 equips you with powerful tools to analyze and evaluate light immissions in accordance with relevant standards – accurately, easily, and free of charge.
Legal Foundations and Standards
DIALux evo 13.1 supports you in evaluating light immission based on both international and national standards, regulations, and recommendations, including:
- EN 12464-2:2014
- CIE 150:2017
- ÖNorm O 1052:2022-10
- LAI 2012
- NSVV 2020
These guidelines define environmental zones, applicable timeframes, limit values, and evaluation methods to objectively assess light immission based on standardized criteria.
Step-by-Step: Light Immission Assessment in DIALux evo
1. Planning the Outdoor Lighting
Begin by planning your exterior lighting system. The immission assessment is not a separate step but is integrated into your regular lighting design process. In Construction Mode, under the 'Site' tool, you define the normative basis: select the relevant standard or guideline, the environmental zone, and the evaluation timeframe – these determine the applicable limits.

2. Placing Evaluation Objects
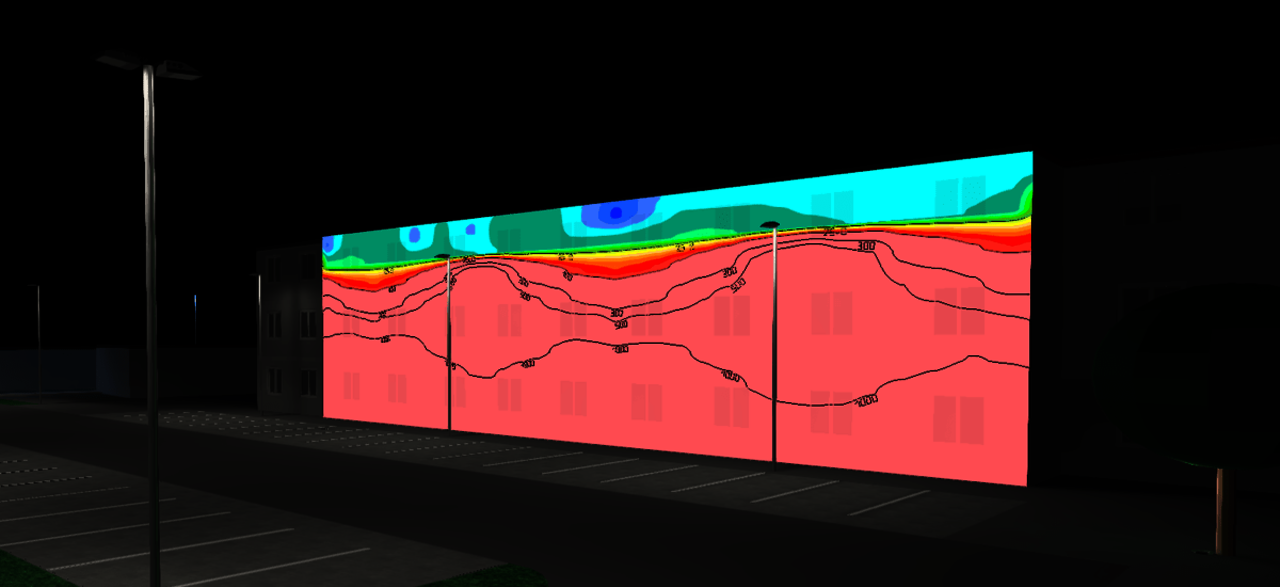
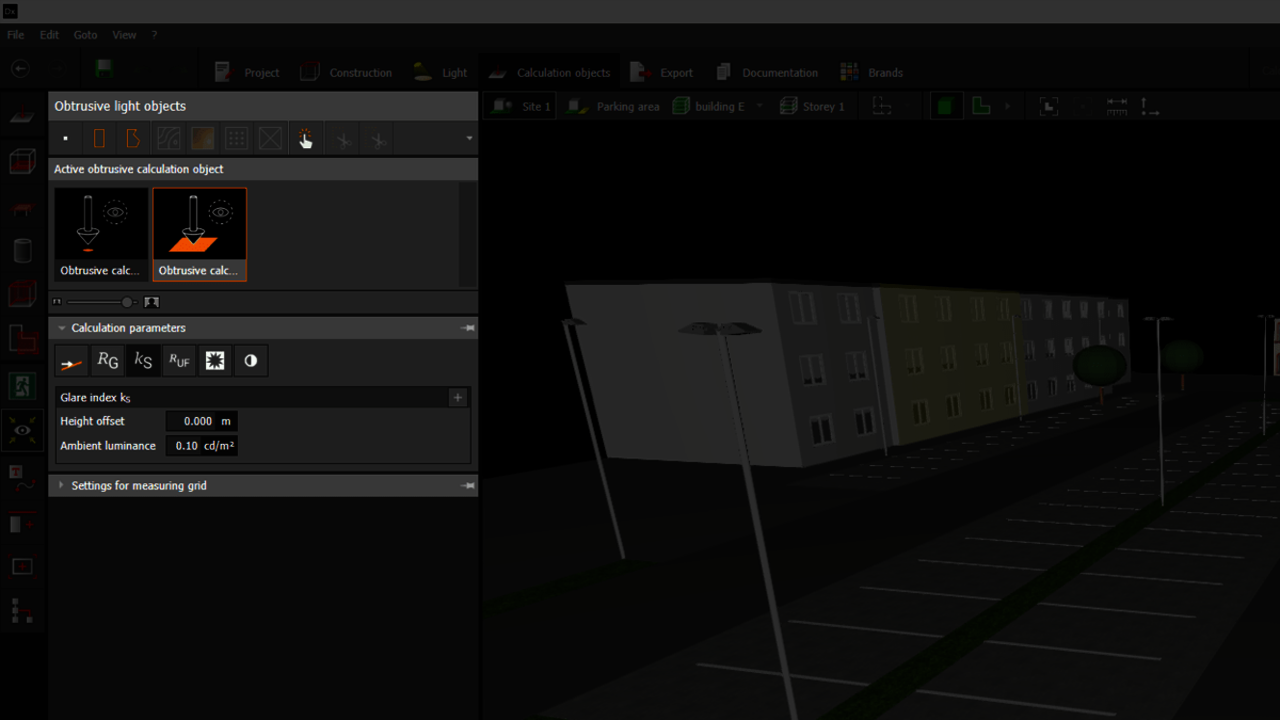
In the calculation objects mode, activate the 'Obtrusive light objects' tool. Here, you place calculation points and surfaces at key positions, such as building facades or sensitive zones.
Available metrics include:
- Surfaces:
- Vertical illuminance (EV)
- Glare rating (RG)
- Glare index (kS)
- Upward light ratio (ULR / RUF)
- Veiling luminance (LV)
- Luminance (Lb or Ls)
- Points:
- Vertical illuminance (EV)
- Glare rating (RG)
- Glare index (kS)
- Luminous intensity (I)
Note: Some values like ULR require additional inputs (e.g., reflectance, target illuminance), which you can retrieve directly from the scene or application profile.
3. Light scene and luminaire assignment
Create an obtrusive light scene via the checklist. Select all luminaires that should be included in the evaluation – typically all outdoor fixtures. You can edit selections as usual using the light scenes tool.

4. Calculation
Run the calculation for your obtrusive light scene. Alternatively, calculate all light scenes at once. The process is extremely fast – even for large projects.

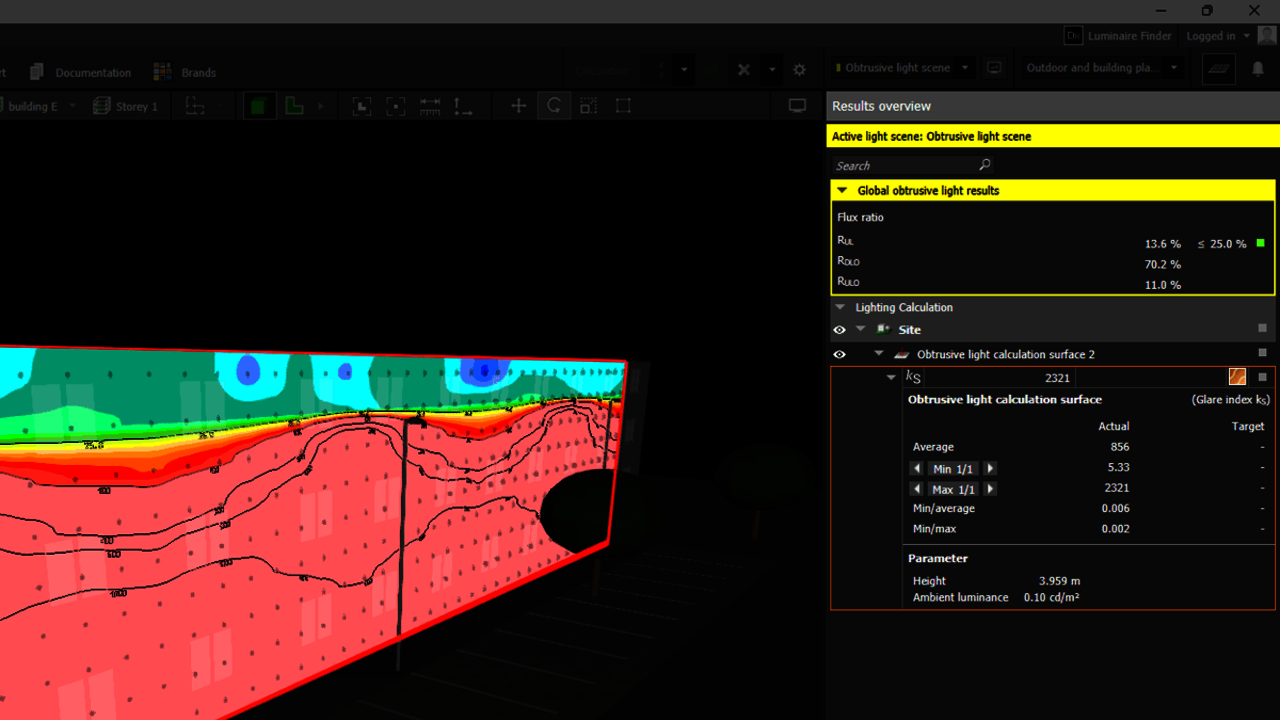
5. Evaluating the Results
In the results overview, you’ll find evaluations of all placed objects. DIALux evo assesses the calculated immission values based on the selected standard, environmental zone, and timeframe.
Important notes:
- These are maximum values, not target values.
- Non-standard metrics are shown but not rated.
- Use the arrow buttons to browse minimum and maximum values in the CAD view – in both 2D and 3D.
- The luminous intensity analysis highlights contributing luminaires – red arrows indicate where limits are exceeded.

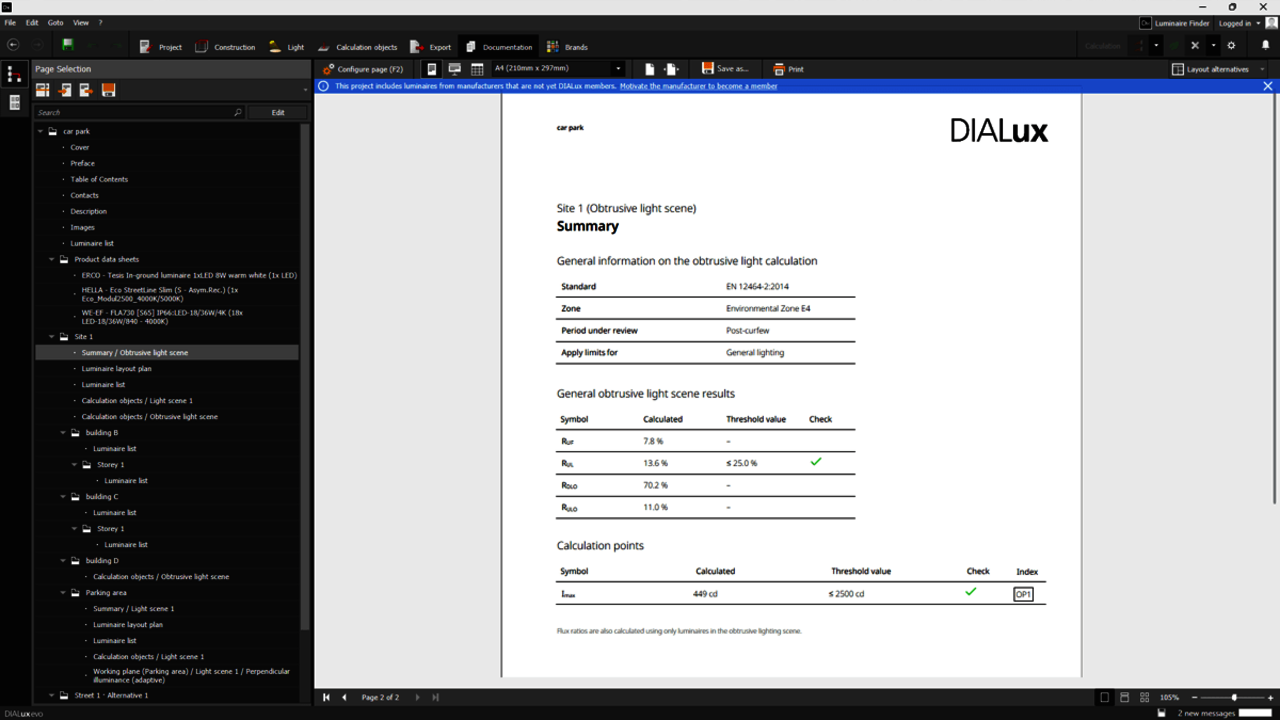
6. Documentation
The results are summarized in a concise light immission report – including all relevant limit values. Optionally, you can output all calculation parameters for the selected objects.
Conclusion
With DIALux evo 13.1, you can reliably check both new and existing outdoor lighting projects for light immission – quickly, accurately, and in full compliance with standards. You get all the tools you need for transparent evaluation and normative documentation – delivered in trusted DIALux quality.
You can also learn how to calculate obtrusive light with DIALux evo 13 in our English tutorial: How to calculate Obtrusive Light with DIALux evo 13.